Tutorial Wagtail Version: 2.x
Custom Admin Tabs
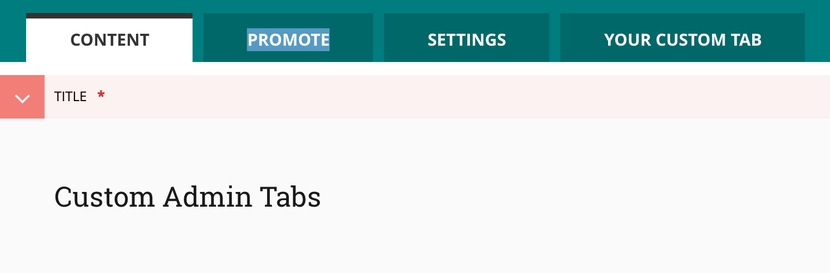
Over time you'll end up creating larger Wagtail Pages with tonnes of fields. That's totally normal. And we can get fancy and group fields together with a MultiFieldPanel, but that still makes one page REALLY long. As an alternative, we can create our own tabs. The "Content", "Promote", and "Settings" tabs at the top of an edited page... we can create our own quite easily. This tutorial will dive into how we do that.
Let's say you have a too many fields on a Wagtail Page, and you want to organize the common fields. One option is to put your related fields in a MultiFieldPanel (ie. all your page banner settings) or if you have more you can create your own custom tab, like what you see below:
To make this happen is really easy. There are 3 things you'll need:
- A TabbedInterface (It's just an import, really)
- An ObjectList (Create's the tab, and only takes a list)
- A list of panels you want to display
Let's take a look at some code.
Code for Custom Admin Tabs
This can all be done in one file, so you might just want to read the code below line-by-line.
Just some light reading. Most of the above code isn't related, it just fills out the HomePage model a bit more so it looks more realistic. The parts you want to read are:
- The imports (namely the
ObjectListandTabbedInterface) - The
banner_panels, and - The
edit_handler
Essentially all we did was:
- Import new goodies
- Create a list of panels (
banner_panels) - Overwrite the pages
edit_handler(tabs) - Injected our custom
banner_panelsinto the middle of the default tabs.
And that's it! It's truly amazing how easy it is to customize your website or application with Wagtail CMS.
The Git Commit
All the code you need can be found above. But hey, if you want to see how it effects the project we're making in the Learn Wagtail course, check out the full commit at https://github.com/CodingForEverybody/learn-wagtail/commit/ea8561d0a4823b653b01130491ec75f7e47ed310
Related tutorials
Adding Custom CSS and JavaScript to Your Admin Area
Posted on
Customizing the styling and adding some additional JavaScript functionality to your Wagtail Admin (backend) is often a good idea for user experience and a higher perceived value for clients. In this tutorial I'll show you how to add a custom .css and .js file to your /admin/ area so you can give your clients a truly customized experience.
View lesson, Adding Custom CSS and JavaScript to Your Admin Area
Adding Custom StreamField Logic
Posted on
There will be times when you need to provide multiple optional fields in a StreamField, and naturally we lean towards using logic in the template. In this video we're going to learn how to pull out template logic and use Python instead. In this example we'll be using a StructValue and StructBlock to return a single URL in the template even though the StreamField has a PageChooserBlock and a URLBlock (pick one and return it).
View lesson, Adding Custom StreamField Logic
Custom StreamField Field Validation
Posted on
Wagtail does A LOT of beautiful things for us, right out of the box. But the
View lesson, Custom StreamField Field Validation
Headless CMS: Custom Page Properties
Posted on
If you want to add data custom data (or a function output) to your headless Wagtail API, you can use a @property. In this tutorial I'll show you how easy it can be!
View lesson, Headless CMS: Custom Page Properties
Adding Custom CSS and JavaScript to Your Admin Area
Posted on
Customizing the styling and adding some additional JavaScript functionality to your Wagtail Admin (backend) is often a good idea for user experience and a higher perceived value for clients. In this tutorial I'll show you how to add a custom .css and .js file to your /admin/ area so you can give your clients a truly customized experience.
Adding Custom StreamField Logic
Posted on
There will be times when you need to provide multiple optional fields in a StreamField, and naturally we lean towards using logic in the template. In this video we're going to learn how to pull out template logic and use Python instead. In this example we'll be using a StructValue and StructBlock to return a single URL in the template even though the StreamField has a PageChooserBlock and a URLBlock (pick one and return it).
Custom StreamField Field Validation
Posted on
Wagtail does A LOT of beautiful things for us, right out of the box. But the
Headless CMS: Custom Page Properties
Posted on
If you want to add data custom data (or a function output) to your headless Wagtail API, you can use a @property. In this tutorial I'll show you how easy it can be!